Studding Outlets
Studding Outlets are manufactured in compliance with ASME Section II, Section VIII, Div. 1, and ASME B16.5. ASME Section I, III and Section VIII, Div. 2, ASME B31.1 or B31.7 are some of the additional codes under which special custom made studding outlets can be manufactured.
Studding Outlet Class
150# 300# 600# 900# 1500# 2500#Studding Outlet Class 150#
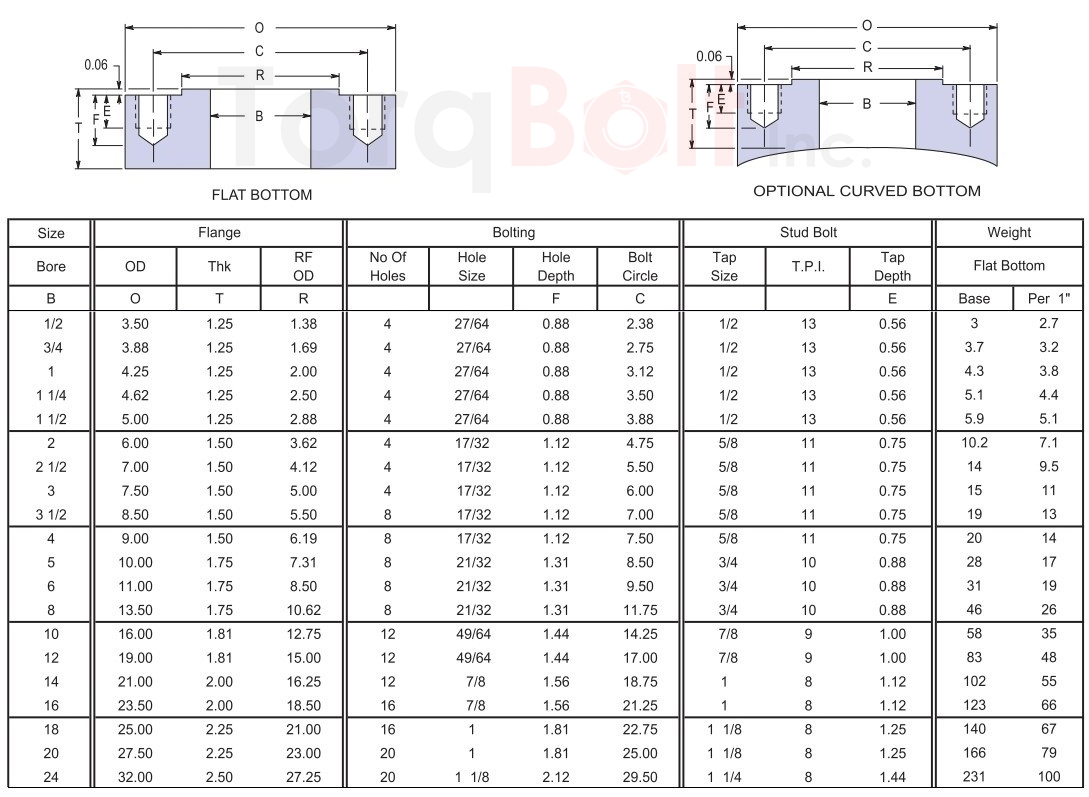
Studding Outlet Class 300#
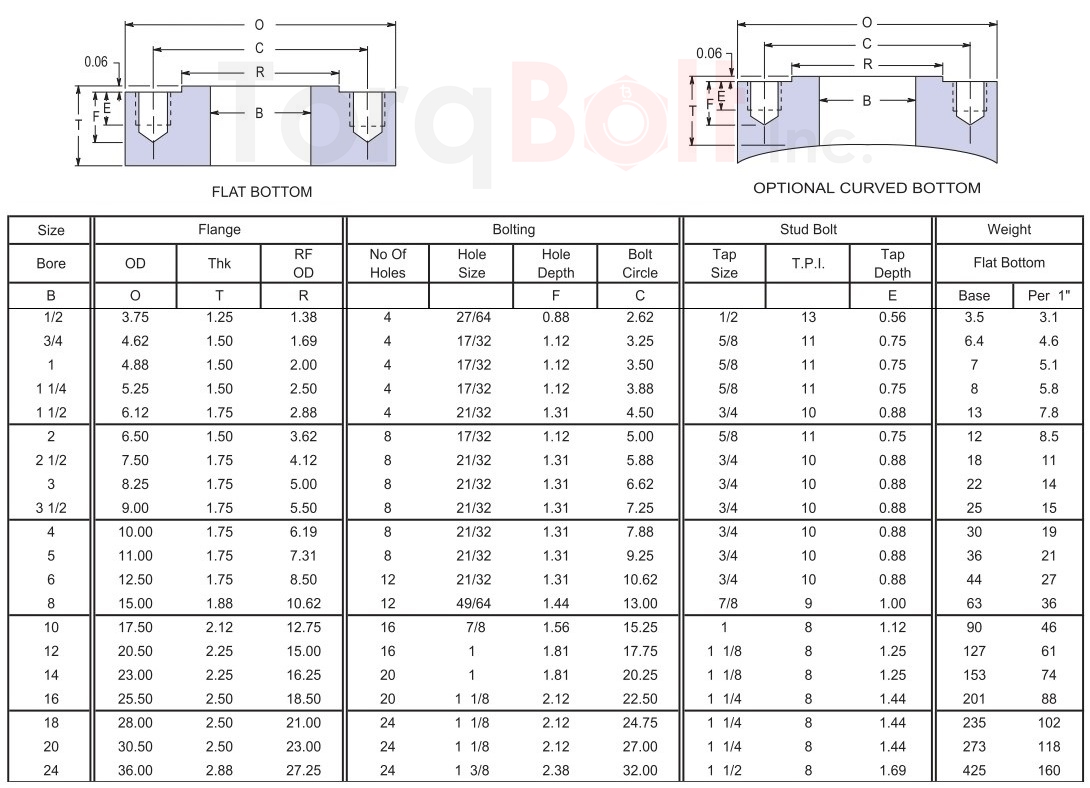
Studding Outlet Class 600#
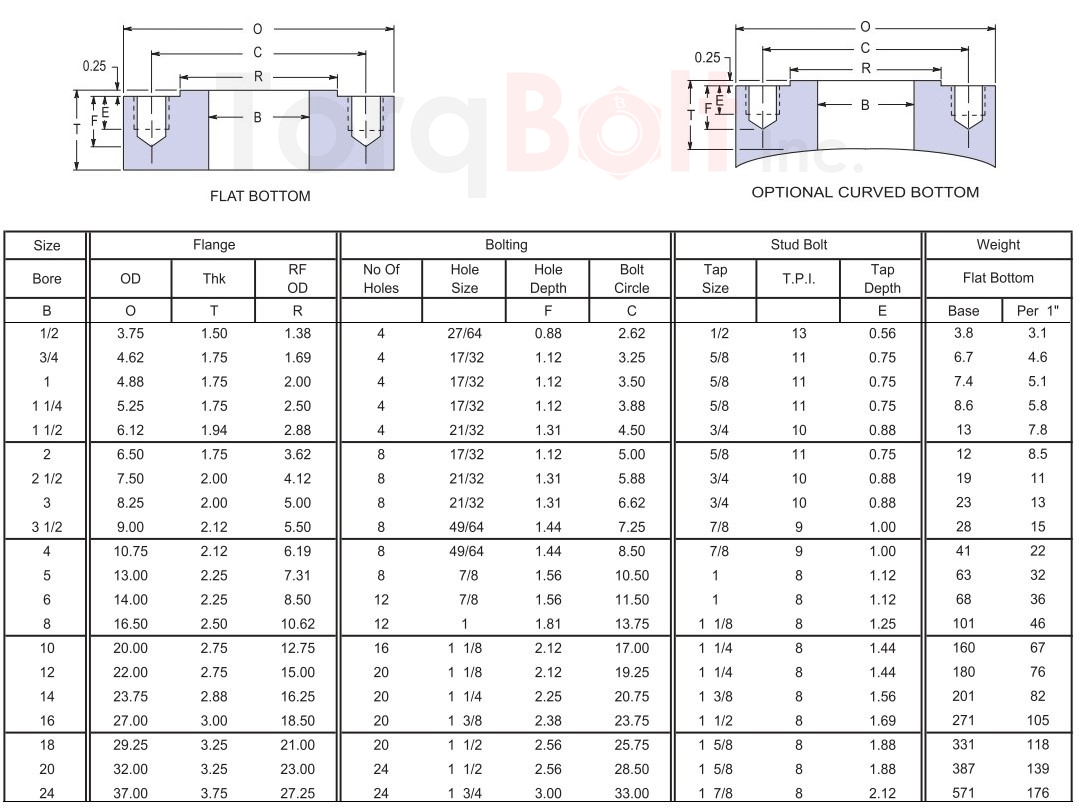
Studding Outlet Class 900#
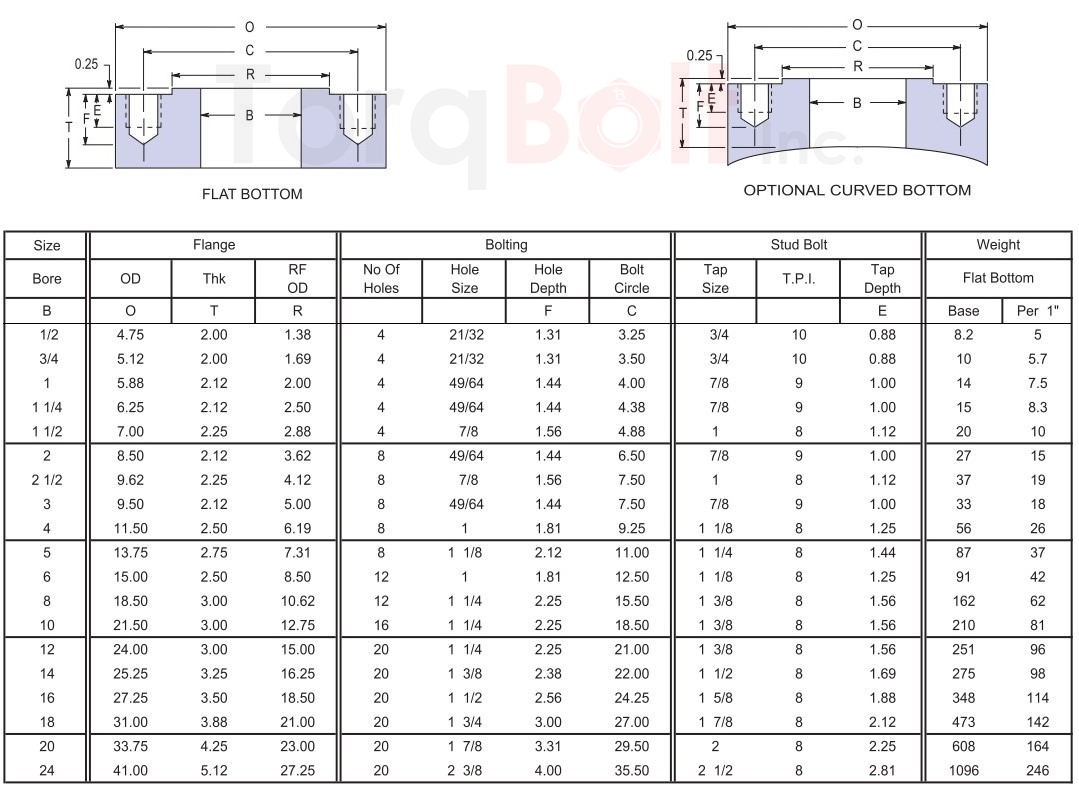
Studding Outlet Class 1500#
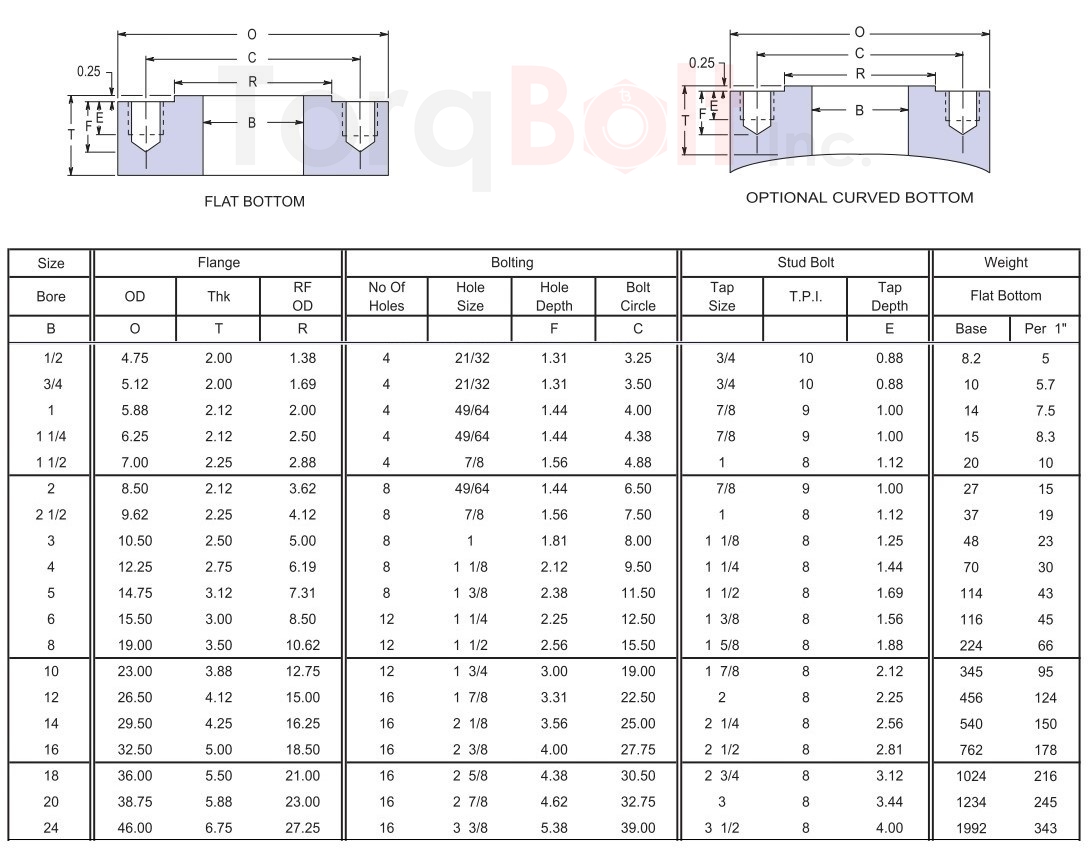
Studding Outlet Class 2500#
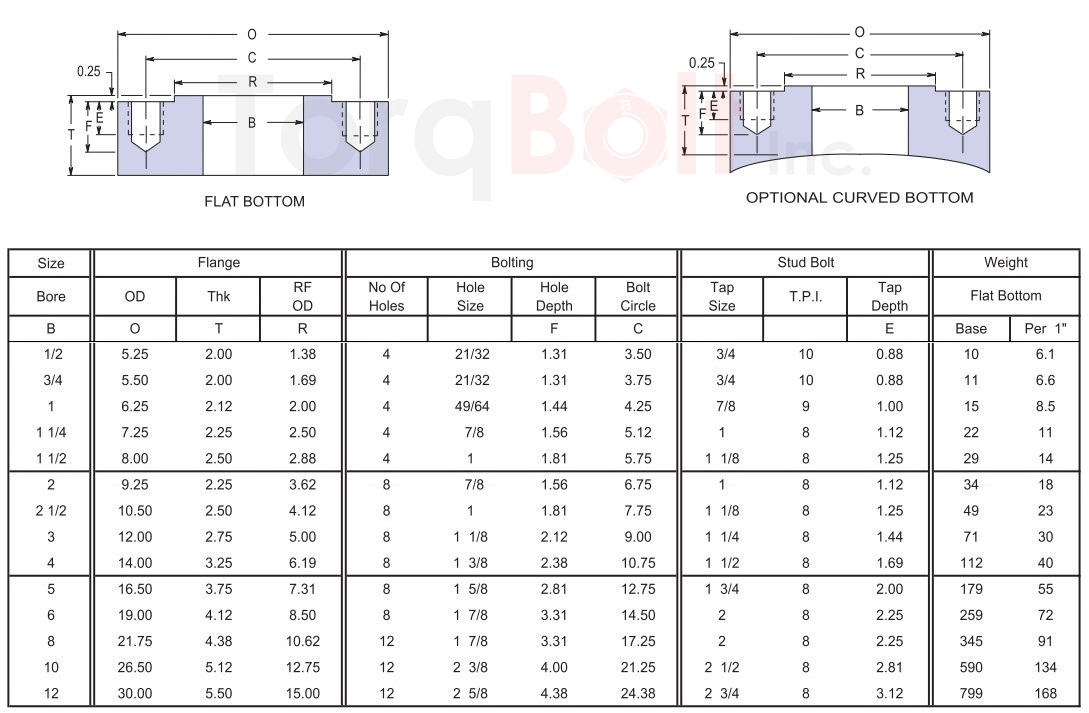
Studding Outlet Face Finish
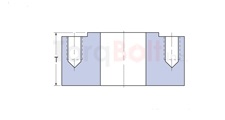
Standard facing is raised face to ASME B16.5. The 0.06" raised face is included in thickness "T" for Class 150 and 300 studding outlet connections. The 0.25" raised face is included in thickness "T" for Class 600, 900, 1500 and Class 2500 studding outlet connections.
Studding Outlet Bore
Standard studding outlet bores are equal to their nominal flange/pipe size. Special bores manufactured are schedule 40, 80, 120, XS, XXS.
Studding Outlet Thickness
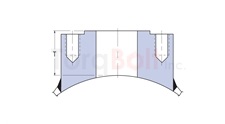
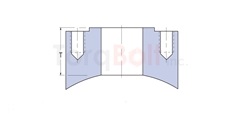
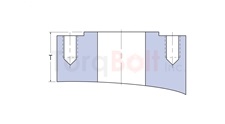
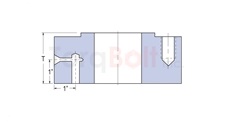
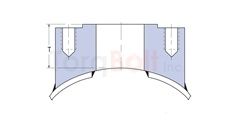
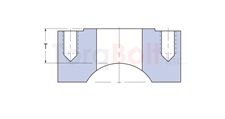
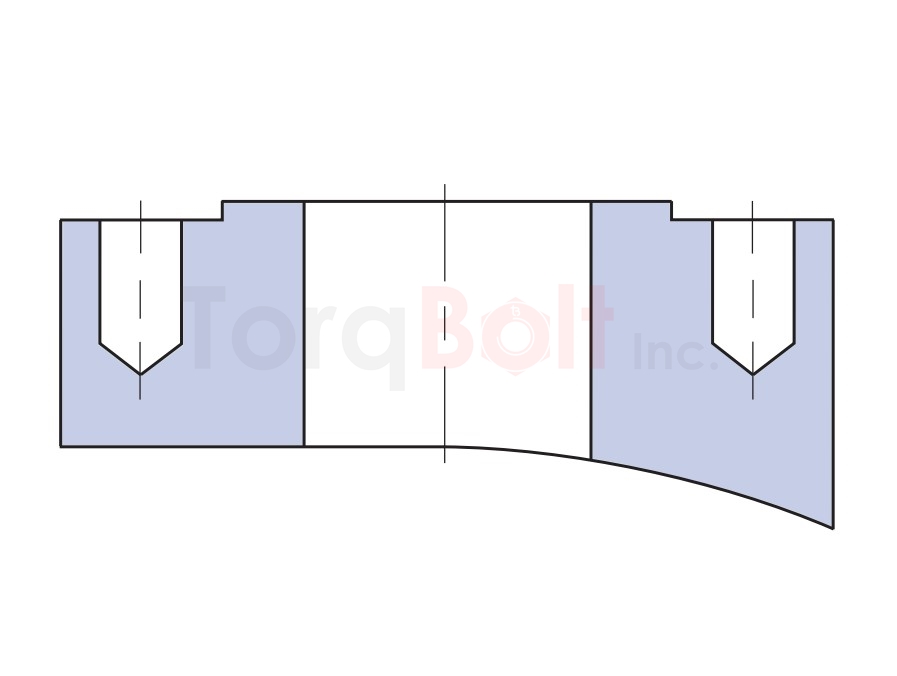
Listed Thickness "T" dimensions in charts are the minimum thickness required per ASME Section VIII Div. 1 for thread engagement and thickness required for installing studding outlets to the inside diameter of vessel shells, heads, cones, pipes, etc. as shown in Figures A, B, C, and D of typical attachment styles for studding outlet connections.
For "through-type" installations as per Fig.B and per Fig.C, thickness "T" must generally be increased in accordance with the requirements of the ASME Code, Section VIII, Div. 1, paragraph UG-43(d), to provide additional material under the drilled and tapped holes of the studding outlet.
Surface mounted "set-on" studding outlets, as shown in Figures E, F and G, generally require a thickness less than that listed in accordance with ASME Code design.
Studding Outlet Body
Studding Outlet Body outside diameters are equal to the outside diameters of flanges, as specified in ASME B16.5 for the size and class of connection ordered. Upon request, studding outlet outside diameters may be increased to satisfy reinforcing requirements. Drilled holes will be tapped in accordance with ASME Section VIII, Div. 1, paragraph UG-43(g). Bolt holes will straddle natural centrelines, unless specified otherwise. Studs, bolts, nuts, and gaskets are not furnished.
Studding Outlet Contoured Bottoms
Studding outlet connections will be furnished with flat bottoms unless specified otherwise. All connections are available with optional "contoured" bottoms for installation in shells, heads and cones. In these cases, the minimum thickness "T" will be measured from the studding outlet face to the bottom contour of the connection. See preceding thickness note and typical attachment style as shown on following page.
Tolerance for bottom contouring will be in accordance with ASME Section VIII, Div. 1, paragraph UG-80 out-of- roundness tolerance. Purchaser to specify when connections are to be surface mounted for special contouring requirements.
Wrap around" connections exceeding the outside diameter of the shell to which they are mounted will have the transverse pendant points square cut.
Tangential/hillside, inclined, and other special contoured bottoms are available upon request.
